

Why Accurate Wheelchair Measurements Matter
Correct wheelchair measurements are essential for:
-
Comfort and posture
-
Pressure relief and circulation
-
Optimal movement and propulsion
-
Long-term health and mobility
Even minor miscalculations can result in pain, reduced mobility, or pressure injuries.
What You’ll Need to Begin
-
Flexible measuring tape (cloth type preferred)
-
A hard, flat sitting surface (wheelchair or chair)
-
A second person to help (especially for back and foot measurements)
-
A notepad or device to record each result
-
Shoes and cushion (if they’ll be worn/used regularly)
Top Tip: Always take measurements with the user in their natural posture, not overly corrected or slouched.
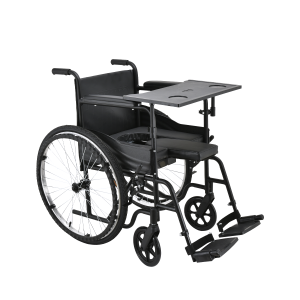
Key Measurements and How to Take Them
Seat Width
How to Measure:
-
Measure the hip width at the widest point while seated.
-
Add 1 inch (2.5 cm) for basic clearance.
Pro Tip: For users with poor trunk control, avoid adding too much extra width — it can cause leaning or sliding to one side.
Seat Depth
How to Measure:
-
From the back of the pelvis to the back of the knee.
-
Subtract 1 to 2 inches to avoid pressure behind the knees.
Pro Tip: In cases of posterior pelvic tilt (commonly seen in elderly or spinal cord injury users), consider adjustable seat depth to fine-tune postural support.
Seat Height (Floor to Seat)
How to Measure:
-
From the heel to the back of the knee, with shoes on.
Adjustments:
-
Add or subtract based on cushion height.
-
For foot propulsion, ensure feet rest flat on the floor.
Pro Tip: Some therapists recommend a slightly higher seat height for users with strong arm function, to ease transfers and reach.
Backrest Height
How to Measure:
-
From the seat base (with cushion) to the lower scapula (for active users).
-
To top of shoulders or head for full trunk/head support.
Pro Tip: Shorter backrests allow greater upper body movement but require stronger core stability.
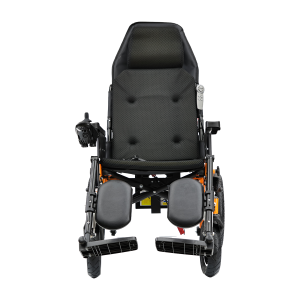
Armrest Height
How to Measure:
-
Elbows at 90°, measure from seat base (with cushion) to bottom of elbow.
-
Add 1 inch for relaxed support.
Pro Tip: For users with limited shoulder strength, slightly higher armrests reduce fatigue and shoulder pain.
Footrest Height & Length
How to Measure:
-
From the back of the knee to the heel with shoes on.
-
Maintain 2 inches ground clearance to avoid obstacles.
Pro Tip: Some therapists adjust one side slightly higher for users with leg length discrepancies or postural asymmetries.
Additional Measurements
-
Overall Width: Seat width + frame clearance (typically 6–8 inches)
-
Overall Length: Seat depth + legrest extension
-
Front and Rear Seat Height Difference: Used to create “seat dump” for stability
Common Mistakes You Better Avoid
-
Measuring with shoes off — changes seat and footrest height
-
Forgetting to factor in cushion thickness
-
Using body measurements while standing (seated is more accurate)
-
Overestimating clearance — too much space reduces support
Some Extra Tips That You May Be Interested
1. Adjust for Pelvic Obliquity or Rotation
If one side of the pelvis sits higher or rotated, seat cushions or custom back supports may need to be angled or shaped accordingly.
2. Consider the “Seat Dump”
Professionals sometimes create a slight rearward slope (rear seat lower than front) to stabilize posture, especially in users with high tone or weak core.
3. Compensate for Trunk Lean
For users who lean or collapse to one side, armrest height and side support position should be adjusted asymmetrically.
4. Use a Plumb Line or Laser
When checking posture, a simple plumb line or laser level can help align pelvis, trunk, and head — ideal for custom fitting.
5. Don’t Rely Solely on Standard Sizes
Two users with identical measurements may need different setups depending on tone, trunk control, and mobility goals.
6. Always Re-Check After Seating Changes
Switching to a new cushion (e.g., gel to foam) or adding accessories affects seat-to-floor height, back height, and balance.
When to Re-Measure?
-
Every 6 to 12 months for active users
-
After surgery, weight change, or posture decline
-
When new equipment (e.g., cushion, backrest, footrests) is added
-
If there are signs of discomfort, pressure sores, or functional decline
Final Checklist
✅ Seat Width
✅ Seat Depth
✅ Seat Height
✅ Backrest Height
✅ Armrest Height
✅ Footrest Height
✅ Ground Clearance
✅ Overall Frame Dimensions
✅ Postural Support Adjustments
✅ Cushion Consideration
Summary
Taking accurate wheelchair measurements is part science, part art. With the right technique, attention to posture, and a few insider tricks, you can significantly improve the user’s comfort, independence, and well-being.
Whether you’re measuring for the first time or refining an existing setup, these best practices and professional insights will help ensure the best possible fit.


